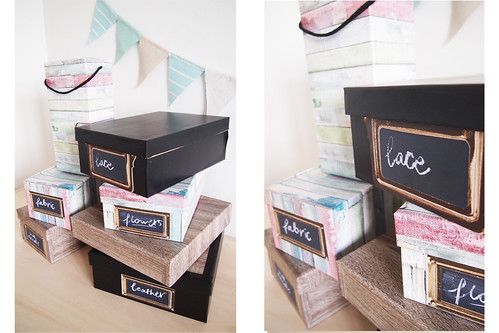
Näin vuoden aluksi ainakin itselläni on aina tarve järjestellä elämääni - niin konkreettisesti kuin kuvainnollisestikin. En tiedä teistä, mutta meillä ainakin on aina tarvetta lisäsäilytystilalle, ja nämä vanhat laatikot on lojuneet varastossa jo jonkun aikaa. Vähällä vaivalla niistä saa kaikista yhteensopivat värillisillä kontaktimuoveilla. Tiedän toki että kontaktimuovi ei ole kaikkein ekologisin ratkaisu, mutta nämä löytyi onneksi paikallisesta ylijäämävarastosta ja olisivat siis muuten menneet roskiin. Ja muutenkin, jos välttää täysin uusien laatikoiden ostamisen niin sehän on jo plussaa!
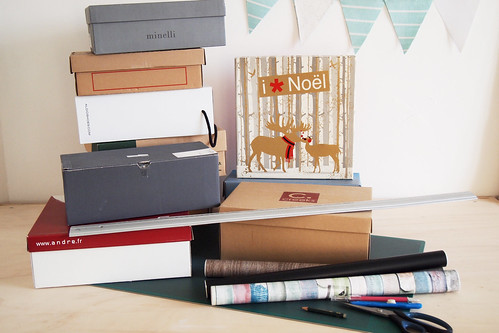
Uudistettuihin säilytyslaatikoihin tarvitset:
- kenkälaatikoita, lahjapakkauksia, ym
- kontaktimuovia
- mattopuukko
- viivoitin
- leikkuualustan
- sakset
- kynän

Ohjeet
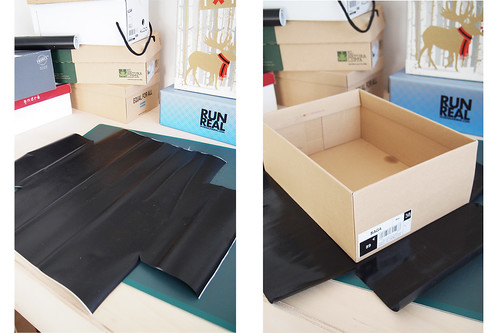
1. Kaksiosaiseen laatikoiden päällystäminen on helpointa aloittaa pohjasta. Mittaa kontaktimuovista pohja ja sivut, leikkaa sopivan kokoinen kappale. Jätä ylimääräistä yläreunoihin sekä jokaisen sivun yhteen lappeeseen.
2. Leikkaa kappale. Irrota suojakalvo ja aseta laatikko muovin päälle. Siloita kuplat.

3. Nosta kaksi vastakkaista sivua (tässä pitkät sivut) ylös ja kiinnitä hyvin. Käytä tarvittaessa viivoitinta silottamiseen.
4. Tee sama toisille sivuille. Taita ylimääräinen pala lappeelta ensimmäisten sivujen päälle. Näin saat viimeistellyt reunat.
5. Yläreunassa taita ylimääräinen osa joko sisälle tai leikkaa mattopuukolla reunoja seuraten.
6. Tee sama kannelle.

Muunmallisten laatikoiden kanssa pitää vähän improvisoida. Muutaman laatikon paketoitua hommasta pääsee kyllä aika nopeasti jyvälle! Itse lisäsin vielä liitutaulutarrat jotta jokaisen laatikon sisällön voi kätsysti merkata.
Heh, tässäpä hyvää tekemistä vaikka viikonloppuun vai mitä ;) Oikein hyvää viikonloppua kaikille, itse aion käyttää viikonlopun sekä lepäilyyn että muutamien projektien edistämiseen!

I don't know about you but at the beginning of the year I always want to reorganise my life - both figuratively and literally. We needed some new storage solutions and we had these old shoe boxes lying around. I decided to spruce them up with some contact paper and now they all match. I know I know, contact paper is maybe not the most ecoligical choice but I found mine in a local surplus shop so otherwise they would have been thrown away. And if you get to use something that you already have instead of throwing it away that's always a great thing anyway!
You're going to need:
- empty cardboard boxes
- contact paper
- utility knife
- ruler
- craft cutting board
- scissors
- pencil
Instructions
1.It's easiest to start with the bottom part of the box. Measure the bottom part and all the sides. Remember to leave extra to the upper part (to be folded inside the box) and to at least two of the sides (to be folded under the other two side pieces).
2. Cut the piece. Peel off the paper. Place the box on the contact paper trying to avoid forming bubbles.
3. Now attach the side parts. Here I started with the long sides. Use a ruler if needed to smoothen out as you go.
4. Do the same thing with the other sides. You should have some extra to fold over the first sides you did to get a perfect finition.
5. When you get to the top edge, either use the utility knife to cut out the extra or fold to the inside of the box.
6. Repeat all the steps with the lid.
You'll have to improvise a bit with the boxes that are of different sizes but it's really easy to get the hang of the thing! I added some blackboard stickers for marking down what's inside.
So here's an idea for this weekend, right? ;) Have a great weekend everybody, I'm going to relax but also work on some projects!


0 comments:
Post a Comment